Monday 20 December 2010

Good morning, it's a bit nippy here this morning! -8 outside as I type! Thank heavens there is no school run this morning! I do hope my Tesco's delivery is still able to get through though! We had a fair bit of snow fall here on Saturday. I'm also hoping that my sister-in-law is going to be able to make it over for Christmas! She's supposed to be flying in from Los Angeles to Heathrow on Wednesday! I really hope they get things moving soon!

Anyway, as I have a day in the house today, I thought I'd start it by sharing a few of the Christmas Cards I made for my Craft stall last weekend, which was a great success! The pint's of socks and the cookie jars seemed to go down really well! as did my packs of Snowman soup! I didn't quite manage to sell everything, so the bits I do have left over, I will be giving as gifts! No waste! I have to say that I've made very few Christmas cards this year. I have even copied some of the one's I made last year as the inspiration wasn't very forthcoming!
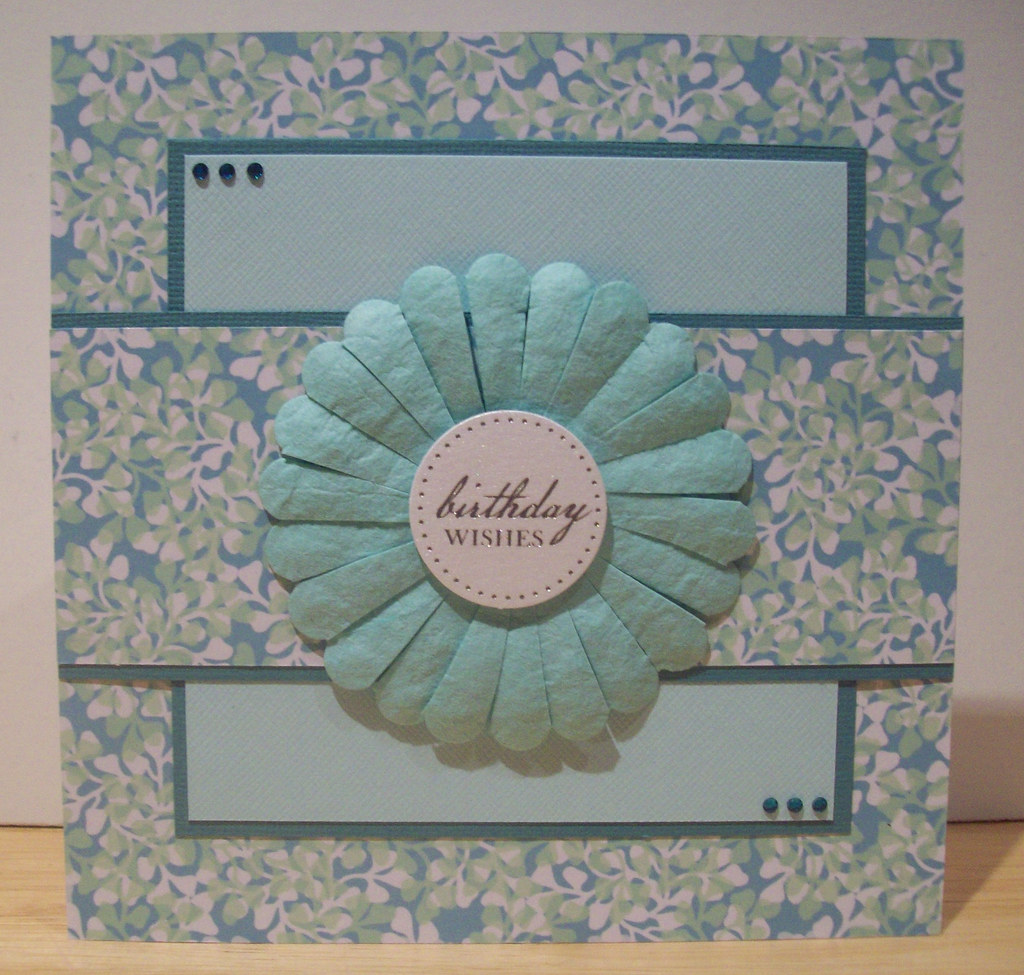
So, onto my first card. This was made as a request for a friend who'd seen my new Elzybells stamp set! In order to use the images of the boy & girl I decided that I would incoroporate them into an Xmas bauble! I really love the colours of this card. Something a little different!
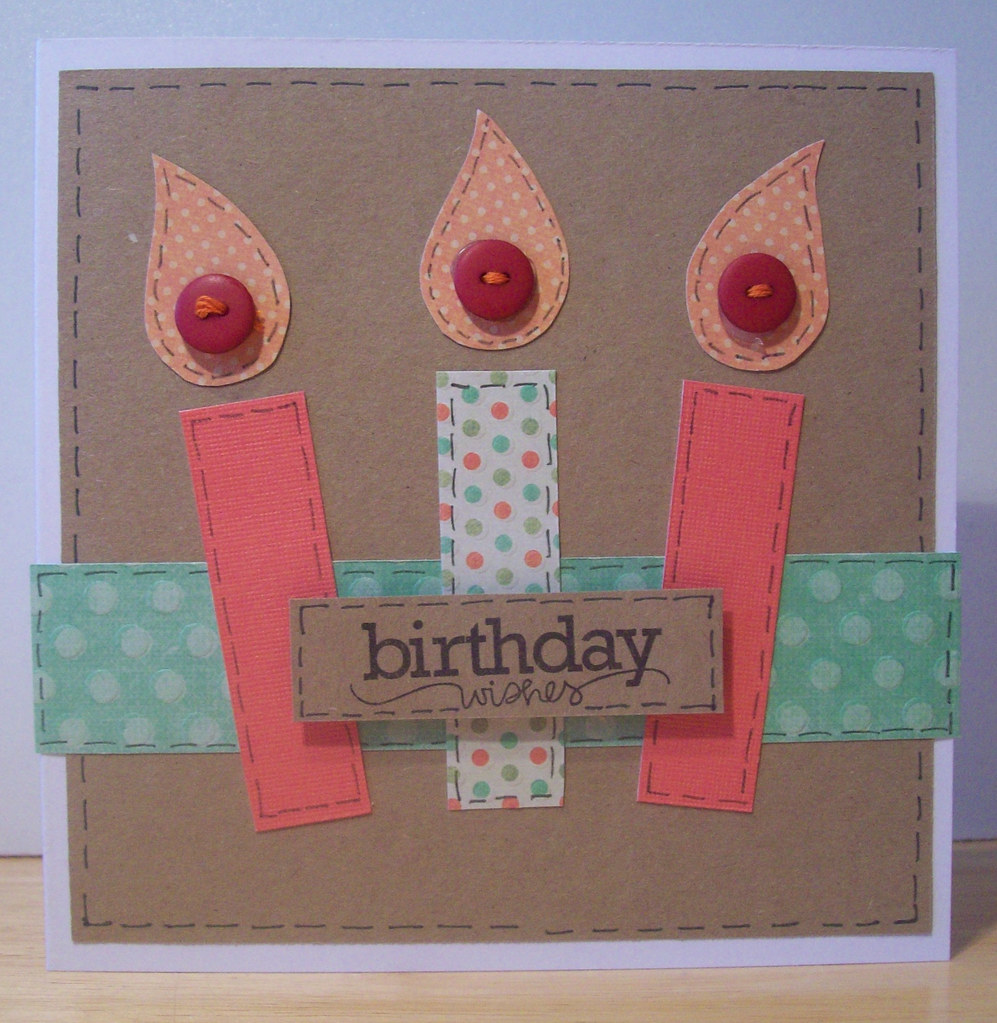
I wanted to make a Santa Suit style card last year, but never got around to it, so it was one of my first makes this time! I had some lovely thick black ribbon in my box and I've cut out the buckle by hand to fit the ribbon. A couple of foam pads here and there and a few black buttons to finish! I think I may give these to my boys this year!
I've made this card using my new Elzybells Reindeer Stamp, and my faveourite layout of the moment! I love the combination of red & brown on Christmas Cards!
This is my favourite from last year, my punched penguin!Followed by the hand cut reindeer! I got the idea & template for him out of one of the craft magazines.Another punched character, Santa!
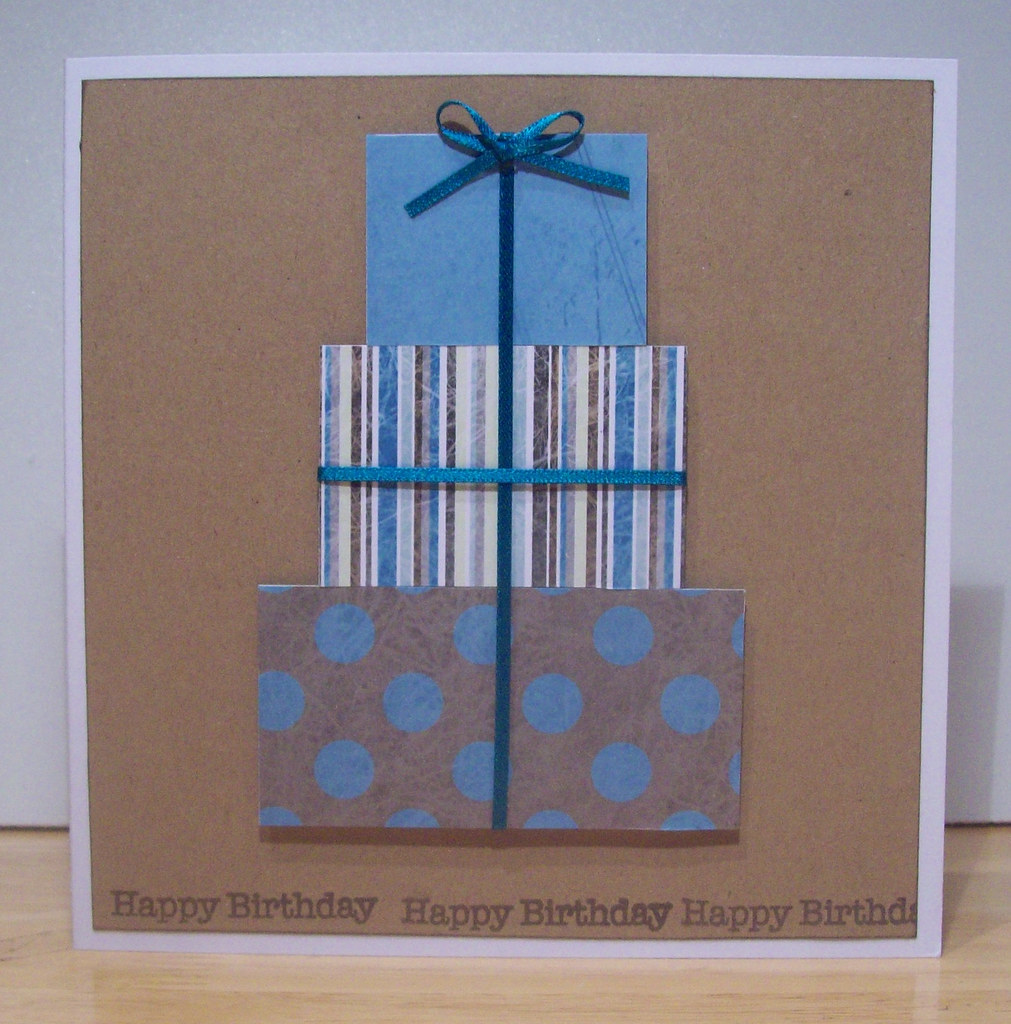
And finally, a punched Robin!
I may well be back with another blog update this week! I'm certainly in no rush to go out! Luckily I've managed to do most of my Christmas shopping so can snuggle up in the warm with my boys! I will leave you with a snowy picture of my garden! Take care, and have a lovely Christmas if I don't get back on!

Friday 10 December 2010

Craft Fair Tomorrow....a long post but lots of goodies!

It's about 1.00am on Saturday. I've just finished preparing for my craft fair tomorrow, so thought I would come on and share the rest of my creations! I've really enjoyed making the gifts this year, more so that cards. I would like thank Helen at It's All Fiddle Fart for giving me so much inspiration, and also to Lisa over at A Day in the Life of a Craft Fairy
I was inspired to make this jar of cookie mix after seeing it on Splitcoast Stampers last year, but never got round to it then. I came across some of these wonderful Kilner Jars whilst shopping in Asda a few weeks ago, and they were just £1 each! For a huge 1l Jar! I bought about 10 of them! I know Tescos/Hobbycraft are selling them for £2.50 each! I found a good recipe here which is perfect for this size jar. I have layered in the ingreedients and made a simple label for the jar. I don't think it needs any more decoration. The pretty layers do all the work! I have baked up a batch and will be taking a few tasters along to display alongside the jars! I bought a few boxes of the festive peanut M&M's. I didnt know what to do with them, so I ate a box. Afterwards, I had a flash of inspiration to make some of these sour cream pouches. I've never made them before and was amazed at how easy they are to make and how effective they are. I've used Doodlebug Christmas Doodles paper and have then added an eyelet and a ribbon, so that they can be hung from the Christmas Tree. I'm kind of hoping these don't all sell!
I found a couple of cute stumpy candles in the 99p shop, which I decided that this year I would decorate and embellish rather than sticking to the stamped candles which I made last year. I invested this year in a roll of Cello wrap from hobbycraft which I think makes displaying them a lot more appealing!
These are my little Elizabeth Shaw chocolate mint's which I've made using some of the Pink Petticoat Mini Christmas images. Sadly though I don't have the nesting punches, so each one of these has been cut using my nestabilities, one at a time! It did take a long time to make them, but I think it was worth it in the end!
This is a mini chocolate bar which came in a pack of 4 from Tesco's. I decided to re-cover them using my lovely sparkly red glitter paper and made a little santa belt for them using some black ribbon and a gold buckle. I've had that punch in my drawer for a long time and I think this is the first time I've used it! I have made a couple of green one's too, so Santa has his little Elf!

The next idea, I got from Little Pudding's Nappy Cakes blog, which I thought was a fab idea! Again, on my trip around Asda I decided that I would have a go at making some of these. I picked up a pack of 4 pint glasses at £0.88p!!! A pack of 4 white Asda value flannels and a pack of basic men's black socks. This was so simple and easy to make, It took me mintues to make all of them! I then searched a few blogs and found one (sorry cant' rember who) that had attached the beer drinkers version of the Lords Prayer as the tag. I've wrapped them in cello wrap and added a little black snowflake to the card, just to Christmasify it a bit! Although they would be great for any occasion!

As If I hadn't had enough the first time round, I decided to make more of the Elizabeth Shaw style mints, only this time I decorated them as Christmas Puddings after seeing the post on Helen's blog. They took a lot longer to make than I'd imagined too! I must remember next time!


If you have managed to get to the end, then thanks for reading and I hope that these may inspire you as the did me!

Tuesday 7 December 2010

Chocolate Snowballs in re-cycled baby food jars!

Last Christmas, I used re-cycled baby food jars for my craft fair. I decorated them and put a little tealight candle inside. This year, as I have my own baby, and lots and lots of baby food jars, I decided to use them to put sweets/chocolate in. I managed to pick up a few bags of chocolate snowballs. Here is the finished product!I've stamped the image using part of an Elzybells set. The paper edged around the edge of the lid is Doodlebug winter asterisks as is the ribbon. I made the little label on the computer. I hope they go down well!

Friday 3 December 2010

Reindeer Noses

I've finally got round to photographing some of the items I've made for my Christmas Craft Stall. Here is the first, my Reindeer Noses. I first saw this idea on Splitcoast Stampers. I love the idea of the 8 brown and then the 1 red (Rudolph's!) nose! The brown one's are Malteesers, and unfortunately some of them did not pass quality control so had to be eaten! The red noses are bubblegum, which I found in a set from Poundland! I couldnt actually find anything else which was the same size as the malteesers and red. I did buy a pack of chocolate "Reindeer Noses" from Morrisons, but when I opened the pack they were more orange in colour than red so I decided not to use them.

I've used my nestabilities labels one die to make the bag topper. The reindeer is stamped using part of an Elzybells stamp.

I will be back shortly to show some of the other bits I've made.

Thanks for looking.

Thursday 25 November 2010

A Handsome Prince?

Here is a card I made a while back using my first Elzybells stamp. I am so sad that Elzybells is no more ;-( I took advantage of the closing down sale though and bought as many stamps as my husband would allow! This is probably one of my favourites though.I made this card 3 times! we've had a few little girls birthday parties! and I thought it would make my life easier to give them all the same card!I've paper pieced the dress using some papers from a Papermania set. I've used glamour dust to create a shimmer on the water which really lifts the card. I stamped some pink and white flowers onto some kraft card to make the background paper and to finish have added some punched flowers and adhesive stones!

I've been busy beavering away in my craft room over the past couple of weeks, getting ready for my craft fair at the beginning of December. Can't wait to share some of my makes with you all!

Back soon!


Wednesday 17 November 2010

DotCom Gift Shop Product Review - Christmas Boxes!

I was delighted to be contacted a few weeks ago and asked if I would review some products from http://www.dotcomgiftshop.com/ The parcel I received contained the following.
A set of 6 brown paper boxes with ribbon, brown paper tags and yuletide deacoupage images. The largest box is 8 x 19 x 13cm and the smallest box is 5 x 8.5 x 6cm.

These boxes are going to be really useful, coming up to Christmas! So far I've decorated a 3 of them. I've been a bit pushed for time just lately, my 9 month old is keeping me very busy! (only reason I'm on here is because he's having nap!) So I still have 3 left to have a play with! I really like the look of the brown paper on the boxes, so I've tried to keep the design really simple by stamping some images on them and then I have simply edged the ribbon around the lid of the box.
The set also contains a huge back of very traditional images. Personally, they are not to my taste, but they would be great for making gift tags/embellishments. They are not really what I would consider to be decoupage images, only a few in the set had smaller matching images which when I tried to layer them, they didn't match up. They would be great to use as individual embellishments with foam pads though. This set is currently half price at only £2.95! A great buy! Well worth the money for the boxes alone! http://www.dotcomgiftshop.com/yuletide-images-s6-paper-boxes

I've used this Set of 6 vintage style christmas ribbons to decorate the boxes. These ribbons are absolutely gorgeous! The base is a cream twill and the colours and patterns are very traditional. Really luxurious! I really love them. Each ribbon approximately 150cm long. My favourites are the pale green stars and the mittens/stockings! And finally, a pack of 12 traditional christmas 3d stickers. These little stickers are really lovely, although I've not had a chance to make anything with them as yet. They are 3d stickers in the postage stamp style! They are embellished with glitter and a few adhesive stones. They would be great for making gift tags and cards with. They are a great mix of colours, with traditional reds and greens but also some pink and blues too.

Friday 29 October 2010

A little something for a little someone!

I decided last week that I would make a picture for my friend's little boy who we went to visit on Monday. Obviously he's Thomas mad and his bedroom is Thomas themed so it wasn't hard deciding what theme to use! The 12 x 12 box frame was a purchase from Wilkinson's for approx £7.00. They were a good £14.99 in Hobbycraft last time I looked!I have used a colouring page as a template for Thomas. I printed out his face onto grey card and then paper pieced the white of his eyes and the mouth. The rest of Thomas is all individually cut out in sections, edged with ink and taped together. It did take quite a while but I think it was worth it! I've used quite a lot of foam pads as I wanted to give it as much depth as I could. I made the background paper using one of the standard patterns in paint shop pro. The train track around the edge is printed onto acetate and then fixed to some yellow ribbon with the eyelets.
I wasn't quite sure what to do with the background, so in the end decided to go with the simplest idea of some grass hills! I've made a couple of tickets, which I've personalised and mounted. I wasn't quite sure where to stick them. Spent ages moving them around, in the end I just had to stick them down, but I think they ended up in the best place! To finish it off, I've used my sizzix alphabet to cut out his name, which I've then layered and cut out by hand! I then stuck the name onto the frame itself rather than adding it to the picture.

Wednesday 27 October 2010

A slightly early Gruffalo Halloween!

Good evening! I thought I'd pop on and quickly this evening as I wanted to share with you my latest creation. My Gruffalo Pumpkin! I took my boys to a Halloween event this afternoon in our local community centre where they had a a few tables with crafts, cakes etc. There was also a pumpkin carving competition. My 4 year old wasn't atall interested in helping carve or empty the pumpkin. He didnt want to put his hands in the slime! I spent last night looking for an idea. I've made Ghosts, Bats, Spiders and a vampire in the past. I wanted to stick to something quite simple this year. Last year's went a bit wrong! I ended up holding it together with wire! My son seems to have a bit of an obsession for The Gruffalo at the moment, so I thought I would indulge him! Funnily enough, there's not many Gruffalo pumpkin carving templates on the internet. I did however, manage to find a mask template, which is what I used to create my Gruffalo face!And here is the handsome fella! I'm actually really pleased how he turned out, and how simple he was to carve. There were a few extra details I could have carved out, but for fear of totally ruining it, I held back and kept it simple! He seemed to go down really well, my little boy absolutely loves him! I even won a bottle of wine for my efforts!
Here is a pic of my boys all dressed up in their glow in the dark matching outfits!
I have another pumpkin which I plan on carving for Sunday night. Think we will just go for a silly face next time though!

Thanks for stopping by.

Sunday 24 October 2010

Birthday Candles

Well I thought I'd try something different and this is what happened! I'm not sure where the inspiration came from for this card! It seems to have worked out well though. Well this was the second attempt at it! The first attempt is the second card, my least favourite! I started out by making my own candle template so that I could cut them all the same! For the first card I've used My Mind's Eye Papers, another recent favourite of mine! I've added some faux stitching to all the edges. The sentiment is from a 99p studio G stamp set! That was so worth the money! I dont have many sentiment stamps and I use this one all the time, as you may have noticed, lol! Adding the buttons to this card was a bit of an after thought, but I think they work well.
I think I'll have a go at making this card in some girly papers too.
Thanks for looking.

Wednesday 20 October 2010

Handmade Paper Flowers

Just a quickie for tonight. I made this card a couple of weeks ago for a lady. It's the only female card I've made just recently. I've been concentrating on making men's cards as I struggle to get inspired. Women's cards seem to be much easier!This paper was part of a free download set from Tinker & Co. I really love these colours at the moment. I've made the flower myself using my nestabilities and an embossing tool. I inherited quite a lot of handmade papers a while ago, but never really used them. They are perfect for making flowers with though. To finish I've added a Craftwork Cards sentiment on foam pads, to the middle of the flower and a few teal adhesive stones. I might make some more like this! It only took a few mins to make too!

Tuesday 19 October 2010

Stacked Presents Collection

Now I'm back into "Cardmaking Mode" again, I've decided to do what my husband told me to do a long time ago and make several of the same design of card all at the same time. My problem is I make one card and spend too much time thinking about it and moving things around. So with this set I've used the same design and just used different papers.This was my first attempt, I wanted to go for a very basic look. I've used DCWV Rockstar foiled cardstock to create the presents. They are mounted on foam pads to add a bit of depth, onto a plain white card, eek!
This is version two! My preferred choice as you can tell by the next two cards that follow! I've used some Kraft card for the base layer. The papers are a download, I really love these colours. The sentiment is from a Hero Arts set.These cards are great for using up scraps of paper! I have had this Making Memories set in my drawer for quite a couple of years now. Nice to see it finally getting used!And the final one, although I'm not too keen on the orange ribbon. I have straightened it up since I took the photo though! lol

Thanks for looking.